Showing posts with label quilt. Show all posts

05 January 2013

Quilted Pot Holders

I recently whipped these babies up for a friend's birthday. These would be great for a beginning quilter to practice.

They are kind of addicting. I think I ended up quilting about 20 or so pot holders for my friends for Christmas this year. I used all scraps. Just piece it however you like. I went with a sort of wonky log cabin, but it could be super simple. One piece of fabric even.

After that just use some Thermolam heat resistant batting stuff, and essentially make a mini quilt sandwich. I added little tabs for them to hang.

And striped binding. Of course. 

29 December 2012

Loopy Squares

I finally made a quilt for my parents. Long overdue. All the fabric was from the same line, so I thought squares would be fun. A few cutting errors later, squares became rectangles. Happy accident I suppose.

My husband says the strip down the back is my "signature." In reality I'm usually scrimping on fabric so I have to add a strip somewhere :)

This was my first go at loopy quilting like this. I originally saw the idea here. It was so fun. I used the seams on the front as my guide. If you're not super confident with stippling yet, I thought these loops would be a great way to ease into free-motion.

Striped binding, of course. I love this Dick and Jane fabric too. I've been holding on to it for years. My mom said it was fun because that what they grew up with. 

 Off to a good home.

20 December 2012

Heritage Quilt

This quilt came to me in a very round-about way. Long story short, someone found out I quilted, so I after a first attempt, they asked me to make this "heritage" quilt. It is for a little girl and all the squares are from clothing items of family members. When they asked me to do it, I immediately thought of this pattern I had in an old book. It's called an Autograph Quilt, and I ran with the idea.

 So after interfacing every single block, I came up with this. Her name is on the middle on the bottom row. Her parents are on each side, and it graduates all the way up to her great grandparents on the top row. 

They were originally going to write the names on with fabric marker, but I wanted to sew them in. (Read: add tons of extra work) It ended up being a lot of fun though. I used a dissappearing ink pen to write it in rough, then I sewed over it with my free motion foot. Thank you fourth grade cursive...

Green on the back.

 Stippled around the names. 

Stars on the border.

And a little helper through it all.
So glad to have this baby done for Christmas. It was a job.

30 October 2012

Another Camera Strap Cover

After seeing Laura's tutorial for a camera strap cover, I decided to make one of my own. I followed the same basic instructions, but I quilted mine (of course I had to quilt it). I like the idea of re-covering as opposed to replacing because it can be washed or changed out if I get tired of it.

First, I measured how wide my strap was. This will be different for everyone. Then I just added .5" to my measurement for seam allowance. 

I gathered scraps in varying lengths, but cut them all to the same width--around 1.5" You could do this with one big piece of fabric, but I wanted it to feel scrappy.

I sewed them all together until I had enough to cover the length of my strap (about 20"+).  After those were all pieced, I cut a strip of thin batting that was 1.25". I wanted to limit the bulk in the seams so that's why I cut it smaller than my fabric. 

 This is me making sure that it will fit. It should be about half the width of your batting, so when you fold it it fits snugly after seam allowance.

I chose to quilt in straight lines down the length of the whole thing. Then I just folded the raw edges on the ends over and stitched them for a finished look. Here's where I skimped too much. I wish I would have added a bit of wiggle room as far as the length goes. I ended up maybe .25" too short. But it's hardly noticeable. 

Here's what the finished piece looks like before you sew it to make the tube.

 I sewed right sides together and turned the whole thing. The easiest way for me to turn is to attach a large safety pin to one side of one end and use that to thread back through the tube. You could use a real turner thing, but I don't have one. It took a little work, but the finished piece looks great. 

After doing this, I think another easy way to do it is to just iron down your edges .25" and top stitch the whole thing, wrong sides together.

Thread it on, and there it is. 
A softer more stylish strap. 

09 October 2012

You Can Make This Quilt

Another quilt post. Sorry. I'm kind of on a roll here.

This one was for my brother's baby boy, due in November. Have I mentioned how fun baby quilts are? They're so fast. No pieced back. No pieced batting. It's lovely. I whipped this one out in two or three days I think.

I found the idea for this one on a favorite blog I follow. It's called a "Strip and Flip" quilt because as you can see, you just piece the strips together and when you are done, you cut out that middle section and flip it, and put it back together. That's it. The best part is that you only need tiny little strips of your 44" wide fabric to make it work. If you're a beginner quilter, this would be a great project for you.

 New wavy line quilting method. You can do this with your normal foot. No need for any fancy quilting stuff. No need to be perfect either. Oh, and almost all the fabric is from Walmart (shhh....don't tell).

 Striped binding.
Again, I'm addicted.

 My very manly husband says the back is borderline girly. I think it's just boy enough.
(Sidenote: quilt+barbed wire = a tricky situation. Very tricky indeed)

Likey.

02 October 2012

Kaleidoscope Baby Quilt

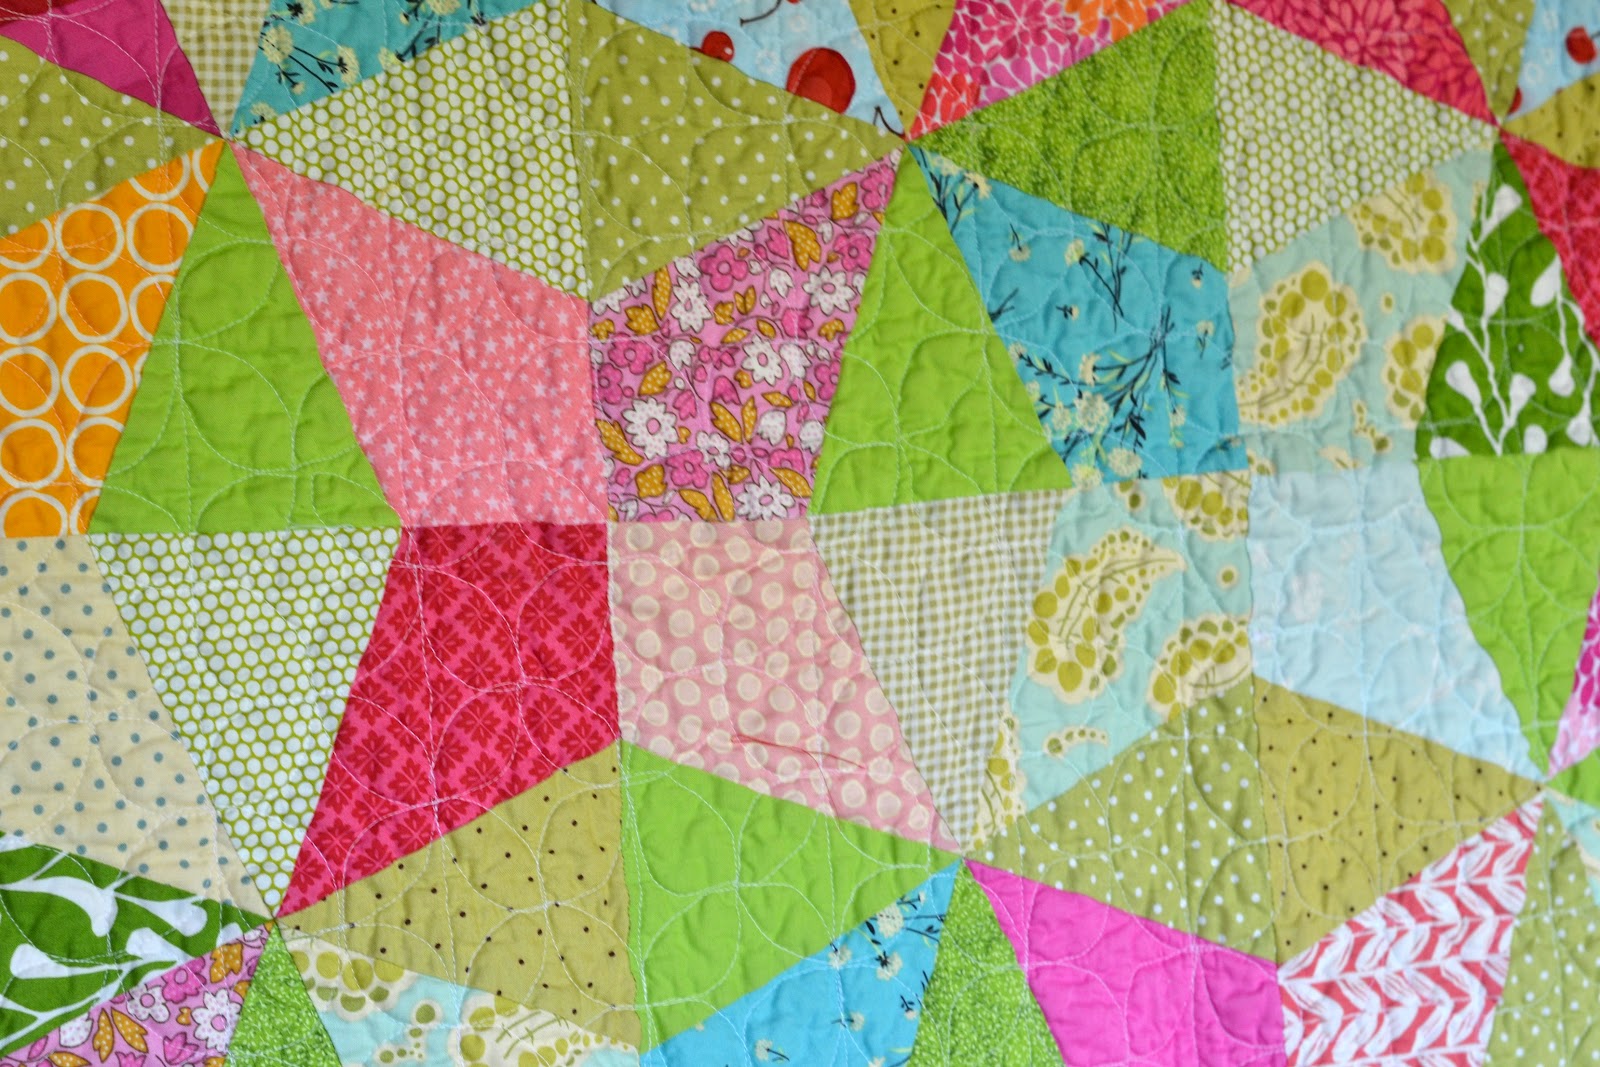
Another quilt done. I made this for my brother's baby girl that will be here in November. I seriously loved making this one. It was something different. I found the pattern here. She originally put circles on hers, but I decided I didn't like that look as much. Plus, I didn't want to cover up my points! They looked too good :)

You use paper templates to cut out the star shapes, then you piece half the square together on a diagonal. Sounds complicated, but it was actually really simple. I think if I were to do it again, I wouldn't do the greens so scrappy. I think it looks better uniform in a solid color. 

The quilting is my favorite part. I tried out this Dogwood quilting pattern, and it ended up being a ton of fun. 

Rounded corners and a pieced back. 
Again.

22 September 2012

Candy Jar Baby Quilt

I've been eyeing this pattern for a while now. I just found an opportunity to make it happen. This Eleanor Burns quilting book is a little older, but I thought I could make a really cute baby quilt if I updated the fabric. I love how it turned out.

 I didn't buy any fabric. This is all stuff I had in my stash. 

Kind of dying over this backing. The ultimate girly fabric. I splurged and paid a little more for it, but I think it was worth it. 

I'm becoming obsessed with rounded corners. It's so much prettier than my mitered ones. I think it looks a little more feminine too. I actually have begun cheating and machine sewing my binding lately. With my new walking foot, I think it looks great. And it's so much faster!

 Back to the stippling quilting. An old favorite. 

All ready for its new home. My friend paid me to make this for a new grandbaby. I think they'll love it. I do.

07 August 2012

Twinner Quilts

These babies have been in the line up for a while now. A friend of mine paid me to make her twin  12 year old granddaughters quilts. The girls picked the color scheme, but I did everything else. I thought it would be fun to use the same color scheme and squares, but two do different patterns. I think they turned out super cute. They are lap size. About 48x58".

 Inspiration from my sister in law, here.

I could have quilted them tighter, but they stay softer this way. The squares were 4" finished, I think. That's a lot of triangles--572 to be exact. 

I found an amazing tutorial online of how to make these Half Square Triangles. Usually people cut out one square, and draw a line diagonally from corner to corner, then sew on either side of the line. This method is different, and much faster. Check out the video here, it's worth your time.

I'm not a huge purple fan, as in there isn't one speck in my stash, so this color scheme was outside my comfort zone. The backing is the same on both. Some people don't like the scrappy strip, but I do.

I entered this one into the county fair (the other one wasn't quite done yet). It's always fun to have your work judged. The best part is when you drop it off and the older ladies squeal in delight because they're so tickled to see a young girl like me quilting.

My score sheets were all over the place, from a 65 to an 85. They said my corners didn't come to 90 degrees and that my binding was "too full". I never knew that was an issue. Good to learn for next time, even if I was 3 points off of a blue ribbon :) 

Now, on to start another quilt!

02 April 2012

Lattice Safari Quilt

This quilt is for my sister. She's having her first baby girl, so I wanted to do something special for her. I really really love how it turned out. Seriously. If this quilt wasn't for her, I would have a hard time giving it away. It's probably in my top three faves. She chose the grey/navy/yellow color scheme and I took it from there.

It was fun doing a palate so traditionally masculine, but keeping it feminine with all the floral, girly prints.

 I think the quilting really kept it simple and soft. Aren't these prints so fun? There's a bit of a safari theme going on, not on purpose though.  Tip: I always like to wash my quilts before I send them off because it really changes the look of them. I like the rumpled, worn look. 

 First attempt at bias binding and rounded corners. Won't be the last. I loved not turning corners.

Off to your new home in Montana!