Showing posts with label Sew Saturday. Show all posts

29 December 2012

Loopy Squares

I finally made a quilt for my parents. Long overdue. All the fabric was from the same line, so I thought squares would be fun. A few cutting errors later, squares became rectangles. Happy accident I suppose.

My husband says the strip down the back is my "signature." In reality I'm usually scrimping on fabric so I have to add a strip somewhere :)

This was my first go at loopy quilting like this. I originally saw the idea here. It was so fun. I used the seams on the front as my guide. If you're not super confident with stippling yet, I thought these loops would be a great way to ease into free-motion.

Striped binding, of course. I love this Dick and Jane fabric too. I've been holding on to it for years. My mom said it was fun because that what they grew up with. 

 Off to a good home.

22 September 2012

Candy Jar Baby Quilt

I've been eyeing this pattern for a while now. I just found an opportunity to make it happen. This Eleanor Burns quilting book is a little older, but I thought I could make a really cute baby quilt if I updated the fabric. I love how it turned out.

 I didn't buy any fabric. This is all stuff I had in my stash. 

Kind of dying over this backing. The ultimate girly fabric. I splurged and paid a little more for it, but I think it was worth it. 

I'm becoming obsessed with rounded corners. It's so much prettier than my mitered ones. I think it looks a little more feminine too. I actually have begun cheating and machine sewing my binding lately. With my new walking foot, I think it looks great. And it's so much faster!

 Back to the stippling quilting. An old favorite. 

All ready for its new home. My friend paid me to make this for a new grandbaby. I think they'll love it. I do.

12 March 2011

Gathered Clutch

I whipped up a few of these for my sisters' birthday Monday (they're twins). 
I found the tutorial here.

It's super light weight, and has nice little dividers inside for credit cards and cash.

Zippers used to scare me, but I'm getting over it. Her instructions made it pretty easy.

I made one for myself while I was at it. I love not having to lug a huge purse into the store with me. That's easy peasy.

Lazy Days Skirt


This is the funnest, easiest skirt you will ever make. I love picking out the fabric and the ribbon to match.
It is so easy because you sew selvage to selvage. All you have to worry about is how long/short you want it!
Find the pattern here.

I found the best length by measuring from the waist to knee, and then add 2 1/2 more inches. For my almost 3 year old, that is 13 inches.

My little girl refused to model it for me, but it is so cute on. Plus I made 3 more for birthday gifts for our little friends.

11 December 2010

Sew Saturday: Advent Calendar

I don't know if this baby is exactly "easy peasy," but it's probably my favorite Christmas decoration. I've been eyeing the pattern for this since last year, but I didn't have time to put it together until now. I found the idea from Sew Mama Sew. (The pattern is a free PDF, so that's definitely a plus)

It's a great scrap buster project. I didn't buy one piece of new fabric for this. I just mixed and matched from what I had in my stash.

 The original pattern says to machine stitch around the edges, but I liked the look of hand embroidery better. The squares took forever! Luckily I had a long drive to Thanksgiving to do it.

The back is so cute! Too bad you never see it. I found this fabric at JoAnn's last year and I bought an absurd amount like 5 yards. It also lines some stockings I made. 


...The best part of course...

12 November 2010

Sew Saturday: Re-Vamp Your Curtains!

**Ha, hope we can all laugh at this...if I'm not super late, I'm early! Totally thought today was Saturday.* :)

I did these a while ago with my mother in law when she was in town, but finally remembered to post about it!
These are really easy, but take a bit of time and measuring.

Supplies: curtains of your choice and 1 yard fabric of you choice.

How to: Cut your fabric the length of the curtain and measure how wide you want it and cut that as well (I did these 14 inches wide). Iron down edges to create a seam, pin down onto the curtain making sure you keep the fabric level (we did this by using a measuring tape, setting it to 16 inches from the top and measuring every few inches across to make sure was all even), then sew along the edges--told you it was easy. The hardest part is making sure everything is level and doesn't pucker when you sew. Finished product:
They really do add a little "spice" to our living room.

Close up picture. You can place the fabric ANYWHERE on the curtain and pick out when this gets old and you want something new (I even thought of using an iron on and then sewing the seam but my mother in law said it might be nice to be able to pick out and change if I wanted). My mom has a few in her house where she actually cut the curtain and sewed fabric in between to adds length to the curtain. She added the fabric about 12 inches from the bottom of the curtain and that looks really cute too. 

Happy Sewing...and enjoy your Saturday!

30 October 2010

Sew Saturday: Halloween Costumes


This year my niece wanted to be a "Barbie Musketeer." I'm not sure if your familiar (I sure wasn't), but barbie wears an apron that can be converted to a cape. Yep. So that's what I made this week. 


It was pretty simple. The way you make the bottom skirt is a lot similar to a simple receiving blanket or burp cloth. 
I forgot to take pictures mid-project, so I made this diagram...


You will cut 2 separate pieces of fabric, then sew them together. I kept the top at 44" (the width of the bolt of fabric) then cut the edges so they were rounded. The height depends on your little Musketeer. I just measured her from her hips to ankles, then added 1" or so for seam allowance.  

Sew both pieces, right sides together. Clip seams around the corners. Then flip so it's right-side out. Iron edges.

Topstitch about 1/4" from the edge.

Then do a set of basting stitches along the top of the cape (the 44") and gather until it's your desired finished width. Mine was around 14". You don't want it to go all the way around their waist, just around the front.

 Gather a couple layers of tule and sew to the bottom cape fabric. It takes some time to play with the widths and spacing to make it look good. Then sew all 3 layers together, and finish by sewing ribbon or bias tape along the top.

The final skirt is totally reversible, and totally cool.


For my costume this year, I wanted to dress up, but I wasn't in the mood to make an obnoxious bulky outfit. 
So this is what I came up with: 

 The preggo Skeleton Shirt.
Technically not a "sewing project" per say, but cute nonetheless.


I used white fabric and Heat'n bond to make the skeleton parts. I don't have a pattern, I just looked at a picture and free-handed the pieces. I placed them all just right on my T-shirt before ironing. (I also found a great tutorial that uses freezer paper stenciling here.)

We found out we're having a baby girl at my ultrasound that day, so I sewed on the bow for a cute touch. 

25 October 2010

Sew Saturday: Baby Bibs & Burp Clothes

 
Well, this post was obviously intended for 'Sew Saturday' but our desktop is dead and our laptop's charging cord is on its last leg so I had no computer over the weekend.

I made these bibs for a friend, and had leftover fabric so I made a few for my nephew's 1st birthday as well. Super easy, and super cute. I found the tutorial for the smaller bibs (pictured on the left) and the burp clothes on this blog (tutorial are listed on the right side of blog). PS. Love her stuff.
And to make the larger bibs, I just folded one of Marshall's favorite bibs in half, traced it on paper, cut out the tracing and used that as a pattern. I used fannel material for both sides and love that they are reversable. I was pretty impressed with them seeing how I am not a "sewer" but I am soon becoming one! Had a ton of fun doing these and they are the perfect gift if you ask me.

Matchy cuteness.

Have fun

23 October 2010

Sew Saturday: Throw Pillows


This week, I put together some pillows I've always wanted to make. I have some other projects lined up, like a massive Christmas quilt, but I have no motivation to start. So... I procrastinate spend my time making other things. Like pillows.

I found the tutorial for this one at one of my favorite quilting blogs, Cluck Cluck Sew. I have a lot of fabric scraps left over from my quilts, so this was a great way to use them. I bought the muslin at Wal-Mart.


 Just iron on the leaves how you want and sew around the edges. Really easy after you master pivoting around the corners.

And, the envelope back. Zippers scare me, so this is the perfect solution.

I found inspiration for this one here. I wish I had more of a variety of vintage buttons, but I still like it. I printed out the "S" from my computer in the font I liked, then just traced it onto the front panel of the pillow with wash out marker.


I attached the buttons using thread and an embroidery hoop. Make sure these are on nice and tight, especially if you have little ones around. Something I learned as I went was to not make individual knots for each button, just keep sewing until you run out of thread.

Once your buttons are attached, you can sew the panel to the back piece.

So that's it. They come together really quickly, and you can take them off too. I'm planning on making more tree slip covers for the larger pillow, then switching it seasonally.

16 October 2010

Curtains, pillow cases, and candy corn

Here are my Sew Saturday projects: some simple pillow cases (I think the fabric is way cute)
and some super easy curtains. (Someday I'll get better at taking pictures of my crafts). I got the idea for the curtains here, but I whipped out the sewing machine and sewed mine. I was going to add a stenciled pattern, but I liked them just plain. Also, I got my flat sheet at Wal-mart for $4 and I only need one. I just cut it in half and hemmed and folded and sewed! Super easy...it took me less time than Ocean's Eleven (which was on during this project). :)
On a random non-sew saturday note, I had to try a candy corn wreath, too. I like how it turned out! (And this one took just longer than the Cosby Show).

13 October 2010

Towel Bag (So Easy!)

This was suppose to be for "Sew Saturday" but I had a busy day of traveling so I didn't get to it. This bag is sooo easy. I do not sew and I made this with ease and in about 30 minutes. I will do my best to explain the tutorial.

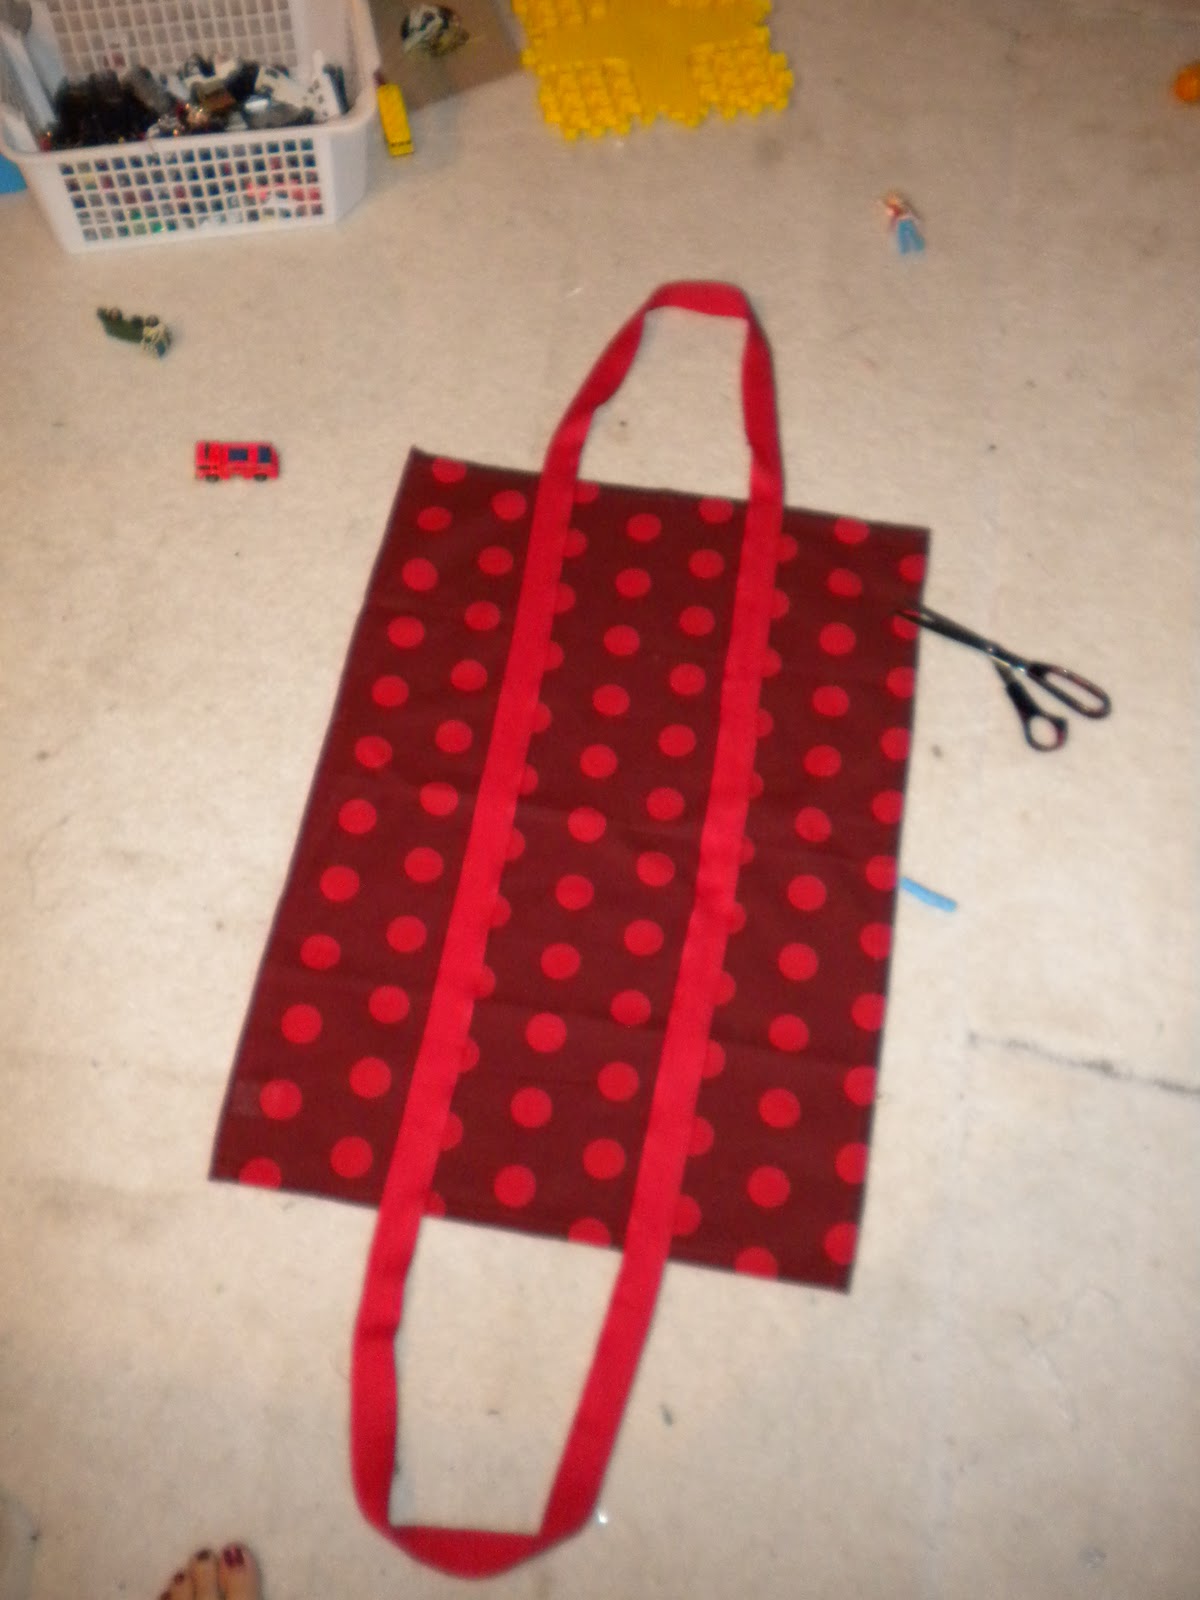
Supplies: Dish towel (this isn't the typical cotton one you get at WalMart. This is the bigger, linen-like, thinner ones. I want to guess the dimension are 18x24inches), 3 yards of rug rope or thicker ribbon. Sewing machine, embellishments if wanted like a button, rosette etc.

This is where I stink in the craft-bloggin, so I will do my best to explain. I don't have a picture for every step...sorry.
Lay your towel out flat and lay out the rub rope/ribbon where you would like it to be placed, leaving loops for the arm straps. Make sure the end of the ribbon is in the crease line where you would fold the towel in half so it is hidden. Pin it down and sew it on, making boxes with "x's" in the them at the top where the towel ends and the loops begin (for added support, you see this on most totes-know what I'm talking about?)

After you have sewn on your ribbon, fold the towel so the patterned sides are facing eachother (inside out) and sew up the edges leaving the opening at the top. 
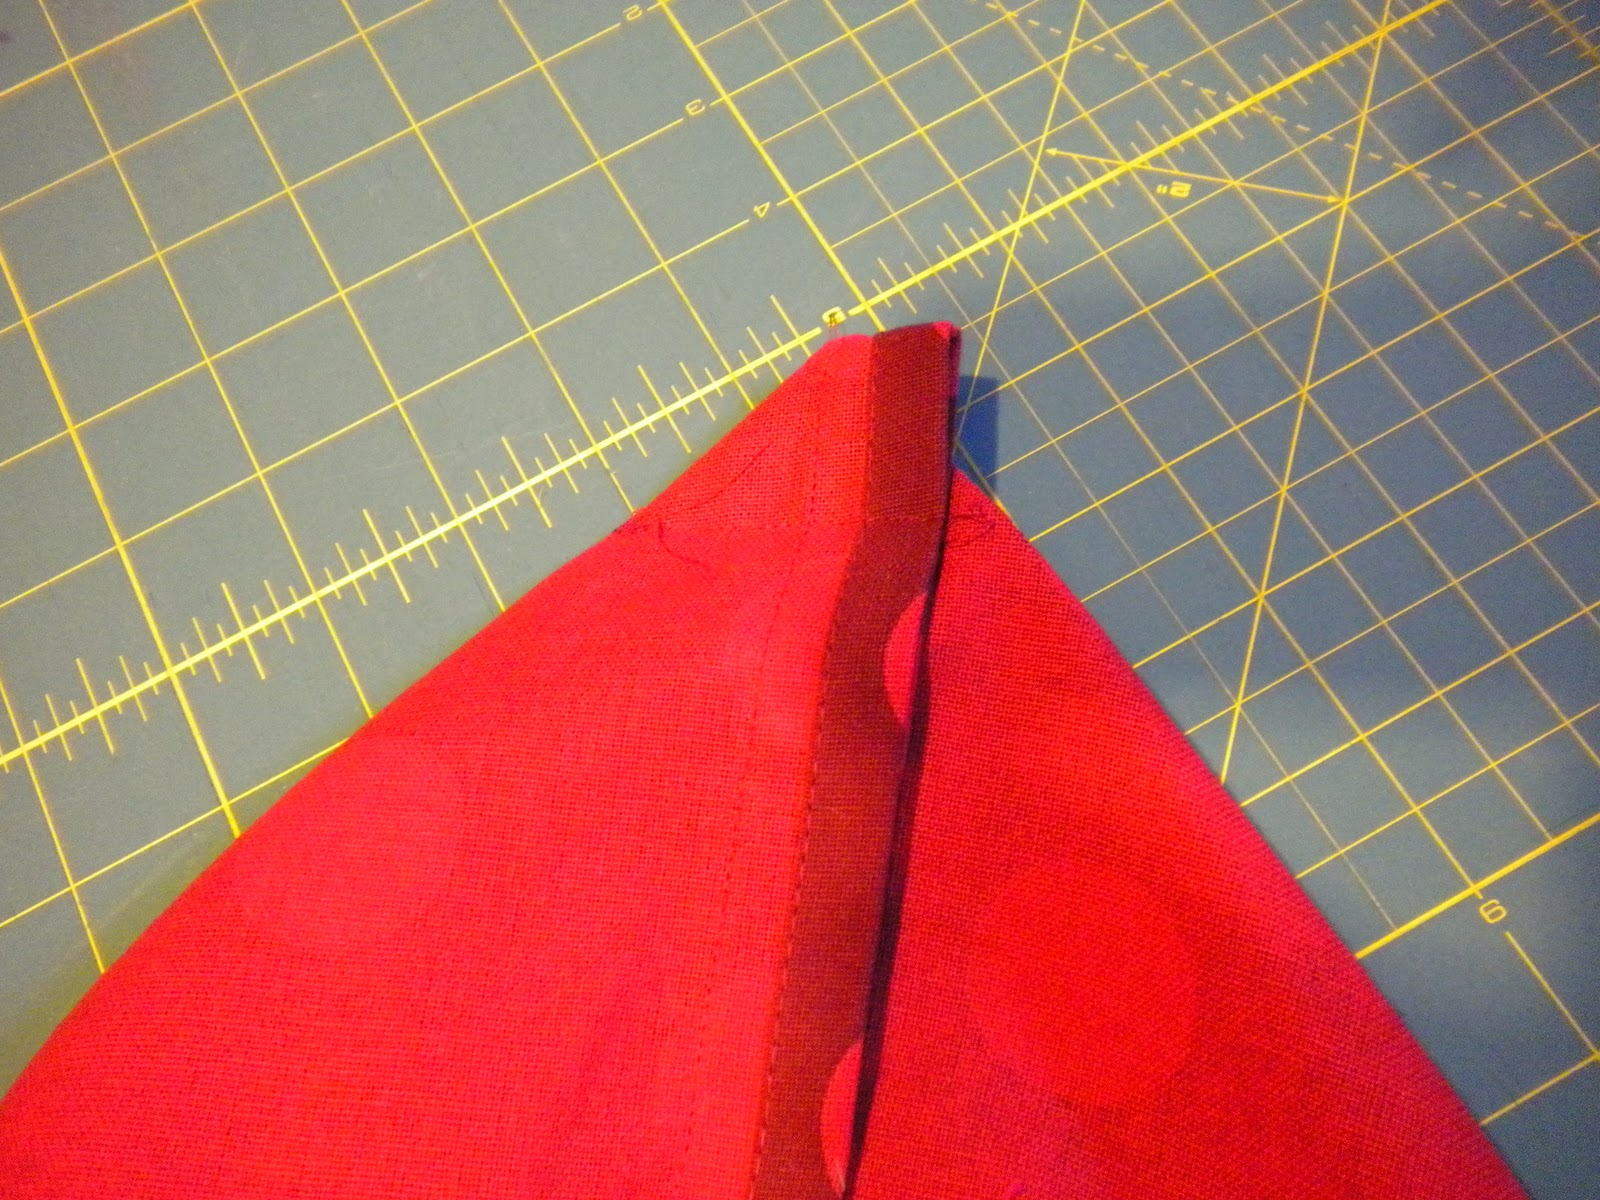
Then is make it so the bottom of the bag is square (this is hard to explain) pull out the bottom so it lays flat and the corner of the bag comes to a point like in the pictures above and below this. Then follow down 2 inches from the point, lay a ruler across and draw a line. Sew over this line.

Turn the bag right side out and push the corners out so it looks like the picture below. You can completely skip this step if you want but it is nice to give your bag a more level bottom. There is a specific name for this--and I can't remember what it is, if you know it please comment it. Remember? Not a sewer here. :)

Here's the finished product!!! It super cute and I use it for my Sunday bag---its the perfect size! I haven't added my bow and button yet. You could even add an outside pocket in a fun, contrasting color or patter in you wanted to. This really is super simple, and I got it done in no time.


Happy Sewing!